
Making of In Between the Gap
By Duy Phan, winner of TMRW2020. Part 1: Construct.
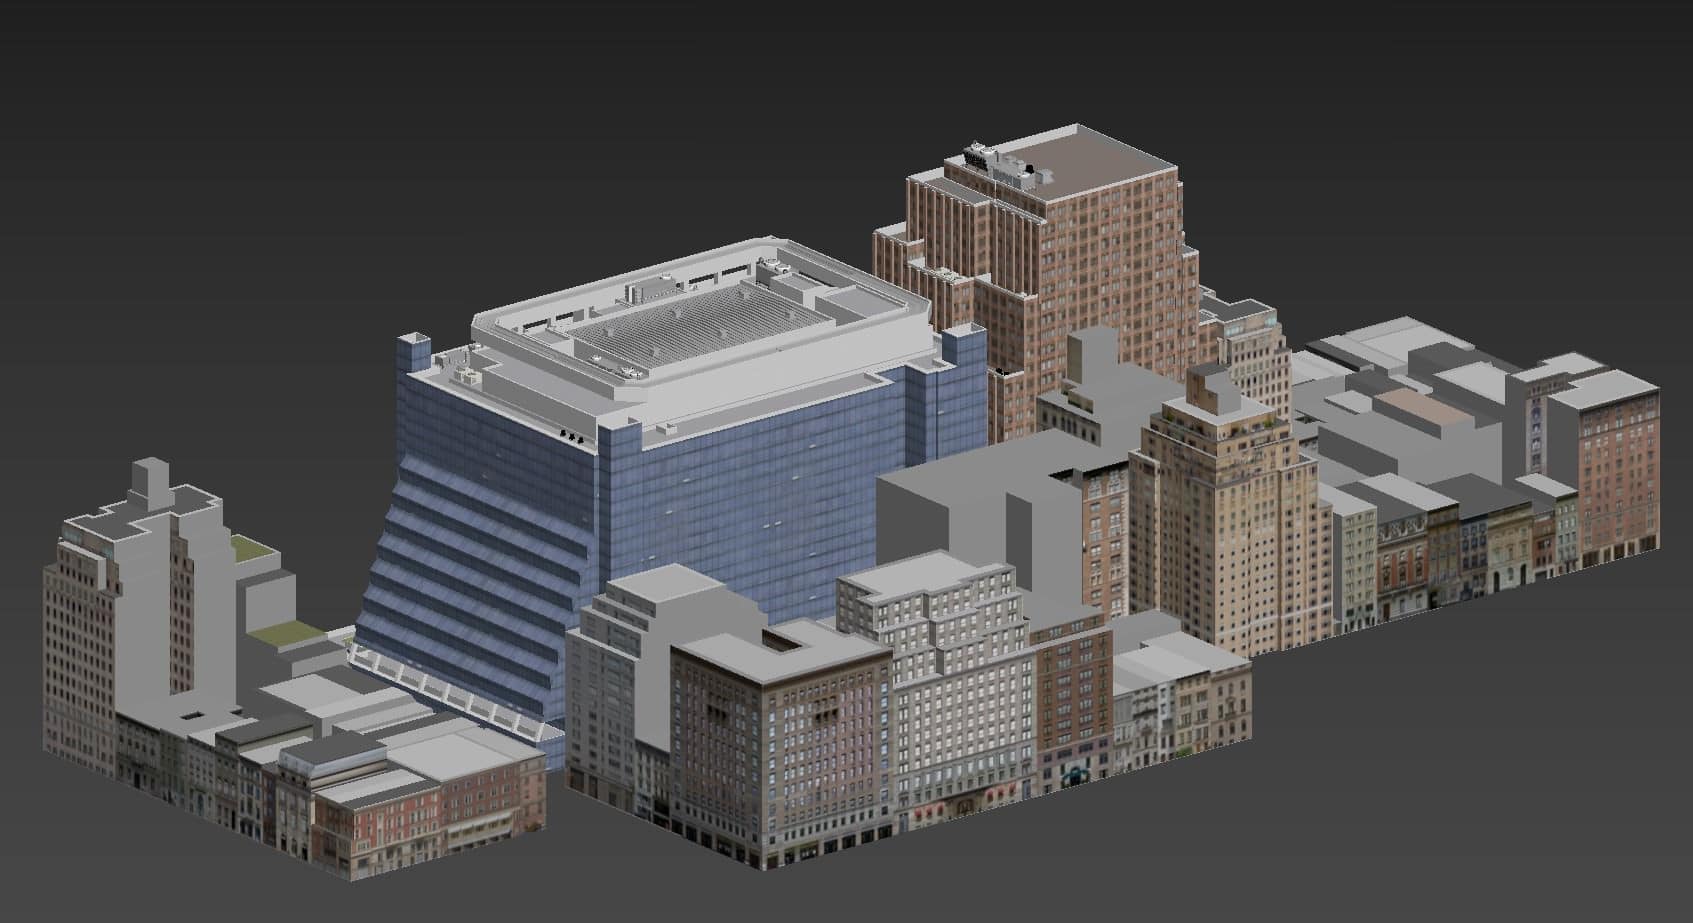
To uncover the appearance of the additional sky bridge, I break down images into four distinguished chapters in the matter of its lifetime.
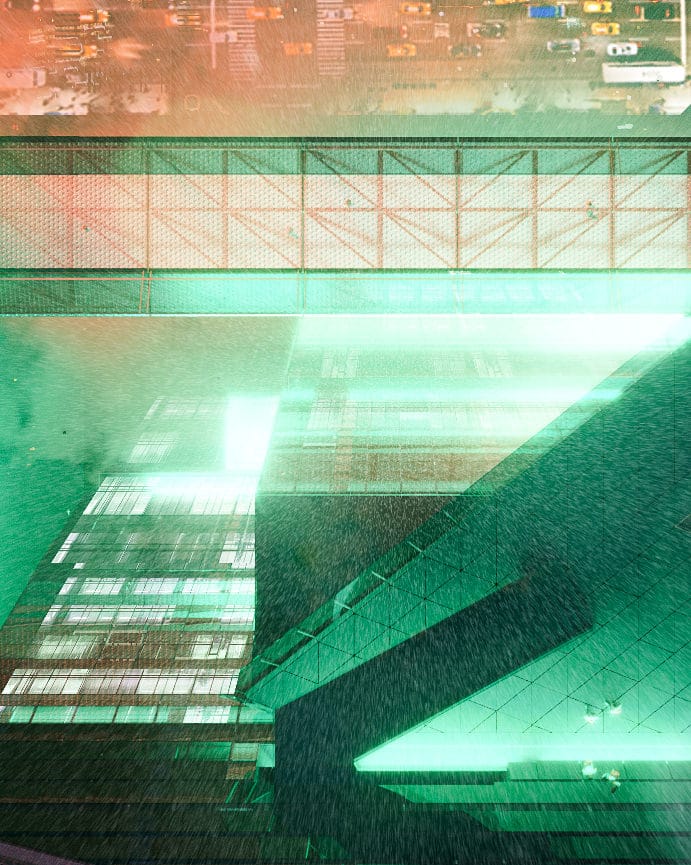
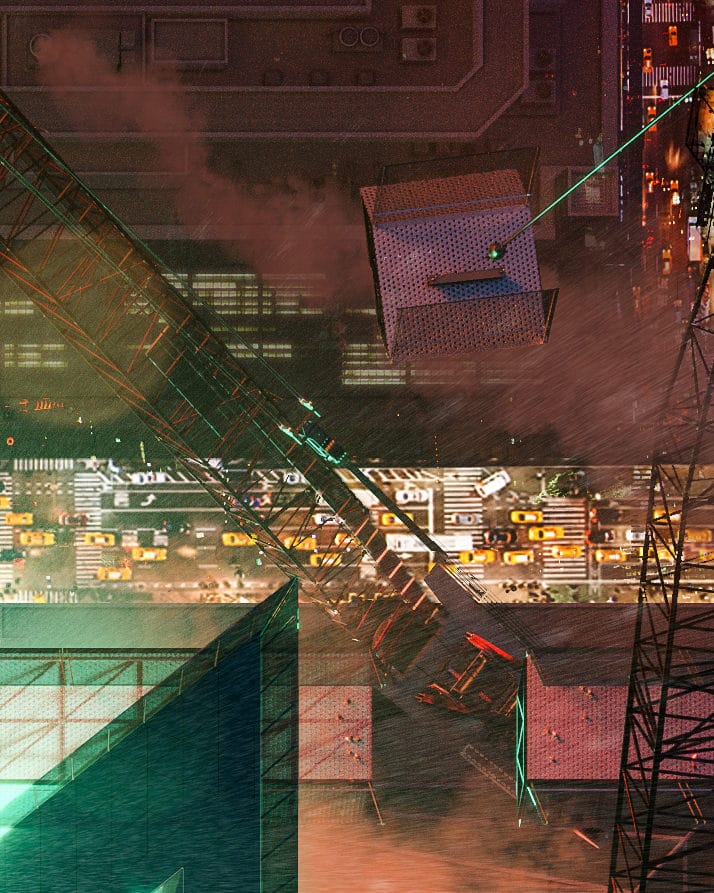
‘Construct’ represents a work in progress of the hanging construction in between Thirty Hudson Yards.
‘Gallery’ is a cherished picture of the ARM conceptual proposal being public in the SHED gallery space underneath Fifteen Hudson Yards.
‘Deadline’ captures the moment of finishing the last piece of the bridge structure, closing the sky loop.
‘Awaken’ is an early morning shot of the bridge’s opening day, starting its mission of breaking the gap between Hudson Yards giants.
Since I approached each of the four images differently, it would be best for me to unveil the marking of them separately, starting with the ‘Construct’ image.

“In Between the Gap – Construct” – The challenge of Tomorrow.
Entry by Duy Phan.
The Arm Concept
I tried to keep the form of the actual bridge as simple as possible. This could help me develop less distracting images with so many details later on as long as conveying the concept idea easier into the viewer’s mind.
At this stage, I am still keeping my model in Sketchup.

Camera Angle Exploration

“In a competition, all you want to have is a distinguished shot. I had the opportunity to have my camera angles more different this time as the designed element is hanging high above the ground. Looking directly down helped me illustrate the impact of the bridge ever more.”
The Initial Setup
Gathering References

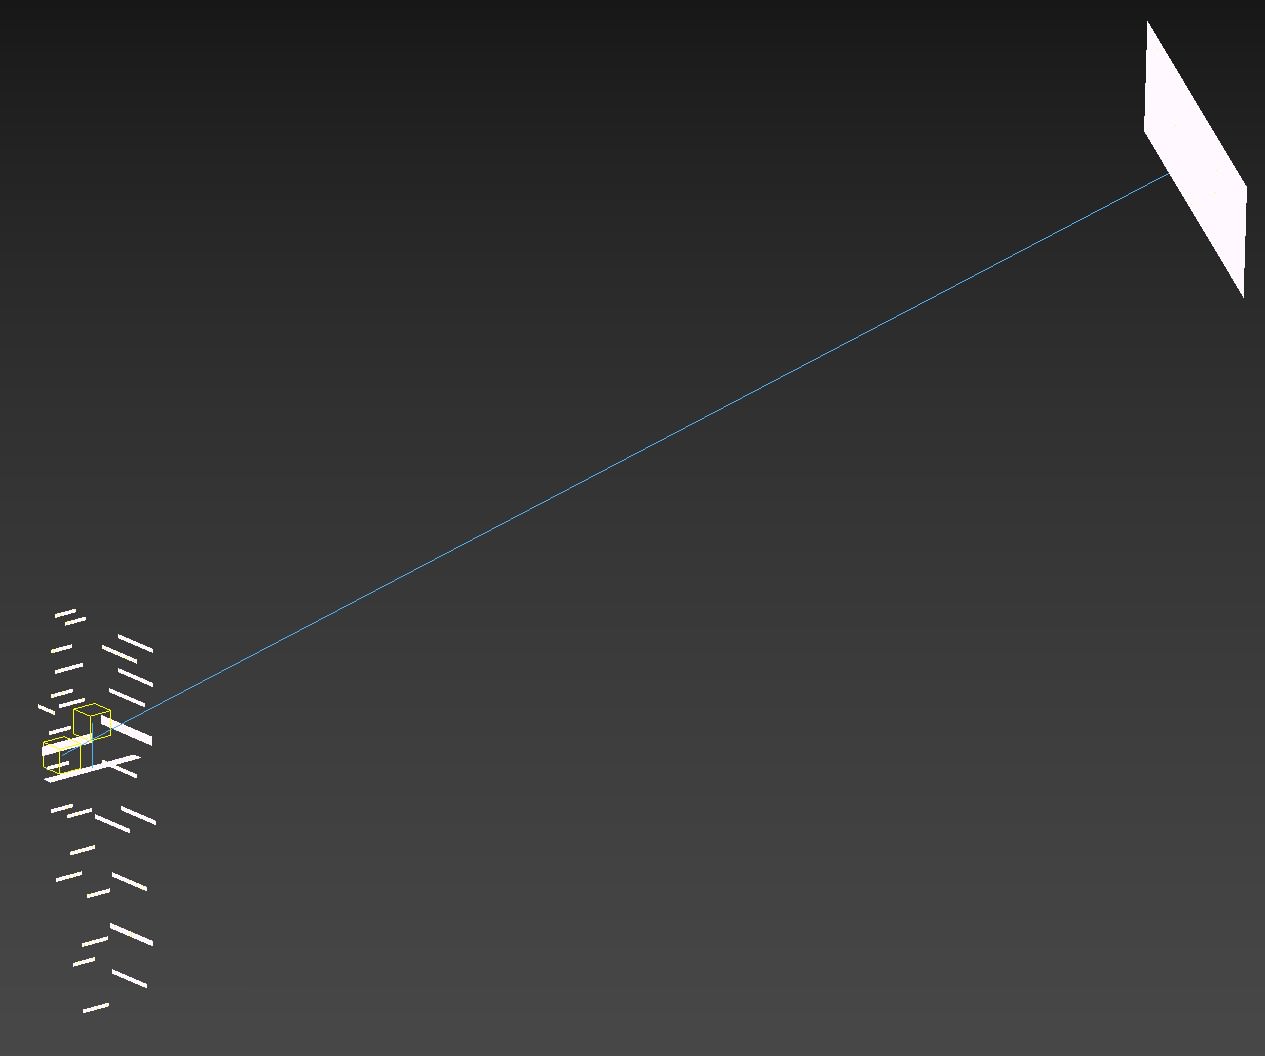
“We usually think of lighting setup as trying to pour more light into the area we want the viewer to focus and tend to forget that using shadow to cover where unimportant does the trick much better.”
Lighting & Shadow
Apart from choosing the most effective camera composition to highlight the focal point that is the bridge, I’m going to need to manipulate the lighting and shadow within the scene to help me draw more attention to it. The bridge being the main actor of the frame called for fading away those sub actors that don’t necessarily need to be vibrant and destructive.
Combining these two methods will help us gain control of the viewer’s focal point much more effectively. I will show you what I did with my lighting and shadow set up here with this screenshot.

The red boxes you see here, I used them purely to block the light where I don’t want viewers to look at to allow the bridge to shine.
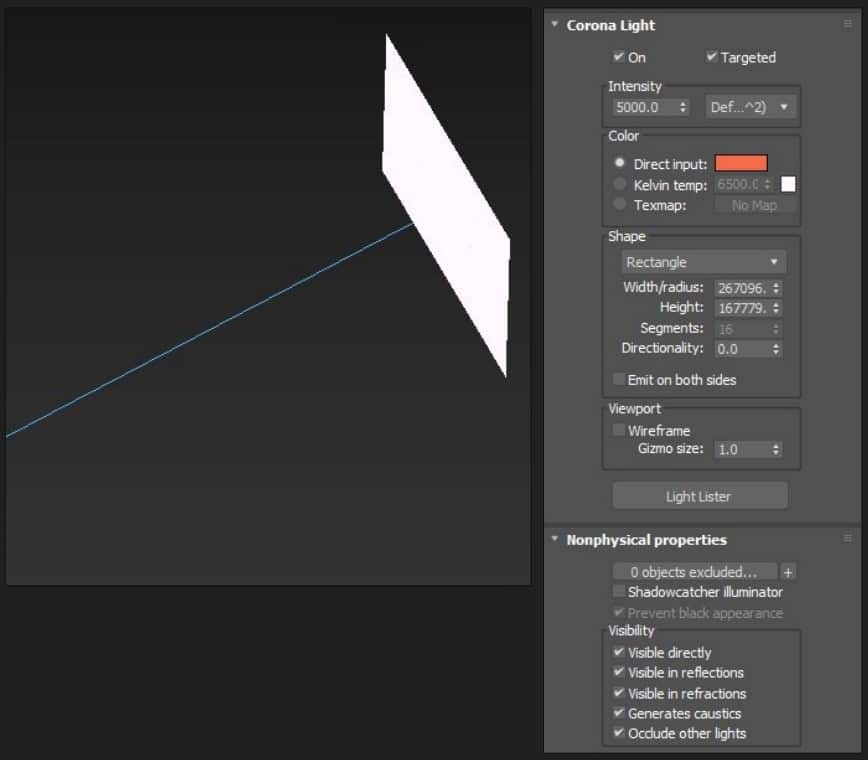
Following the references before, I set up the scene with three primary light sources.
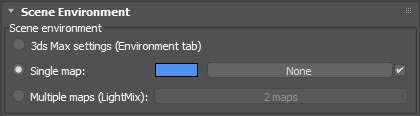
Some basic rectangle lights are being put against the tower’s facade to backlit the internal activities inside out, then another target light to mimic dusk sunlight. The last one is the environment Corona Renderer default skylight with a tweak in color to make it blue-er.
You can find the setting for them as well as their placement in the screenshots below.


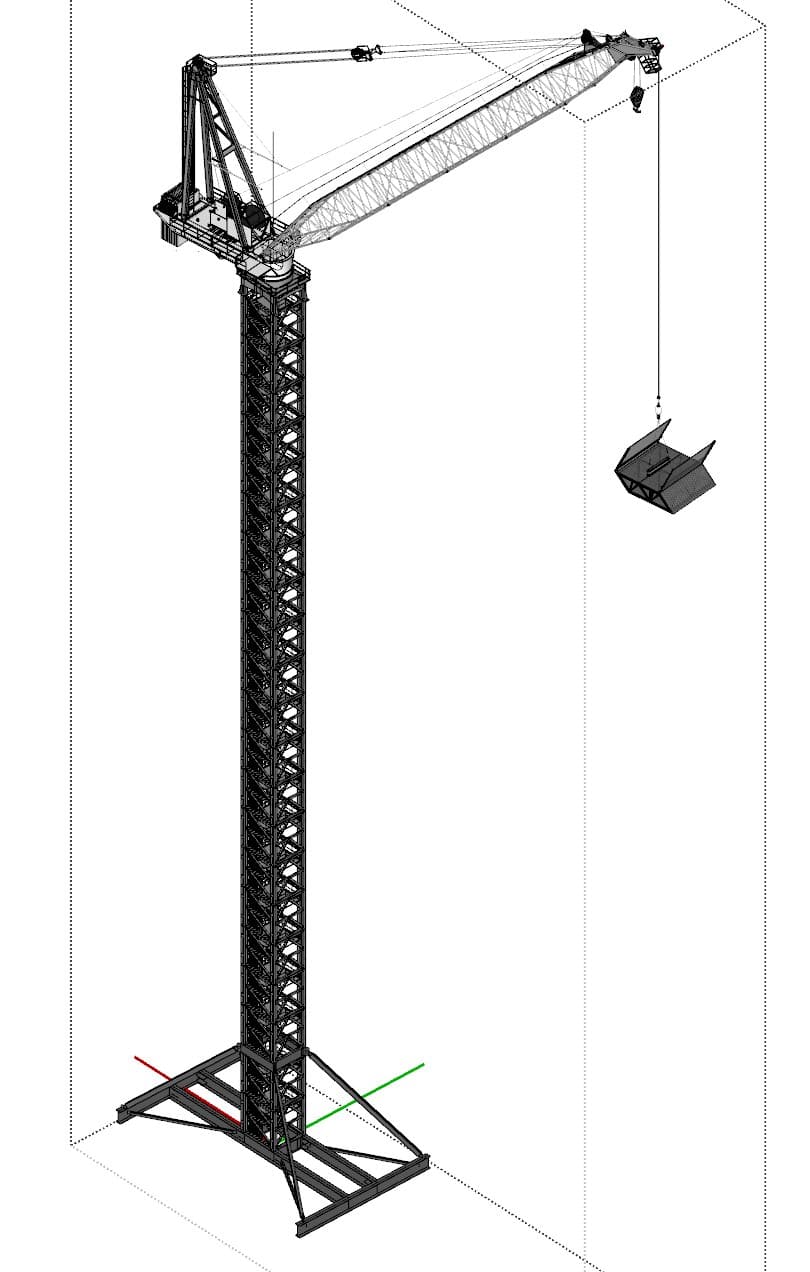
Modeling
3D Modeling
I am just trying to show what I did to build up the context model to bring the image’s crowded sense. Lucky for me that the context models weren’t that complex, and my cams were not that close to exposing those silly details I had there.

Making sure I knew what would be in the frame, I could confidently detail the model where I knew I’ll see things so as not to invest time and effort elsewhere.

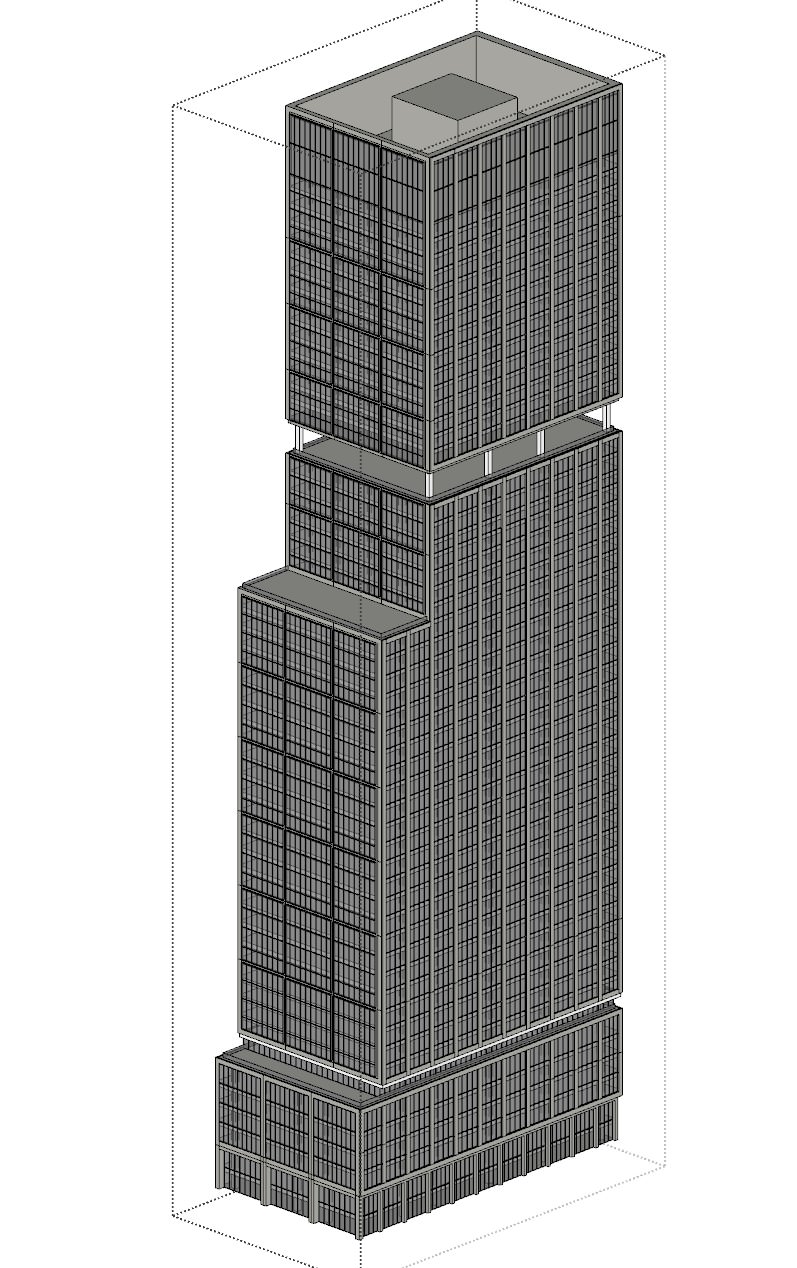
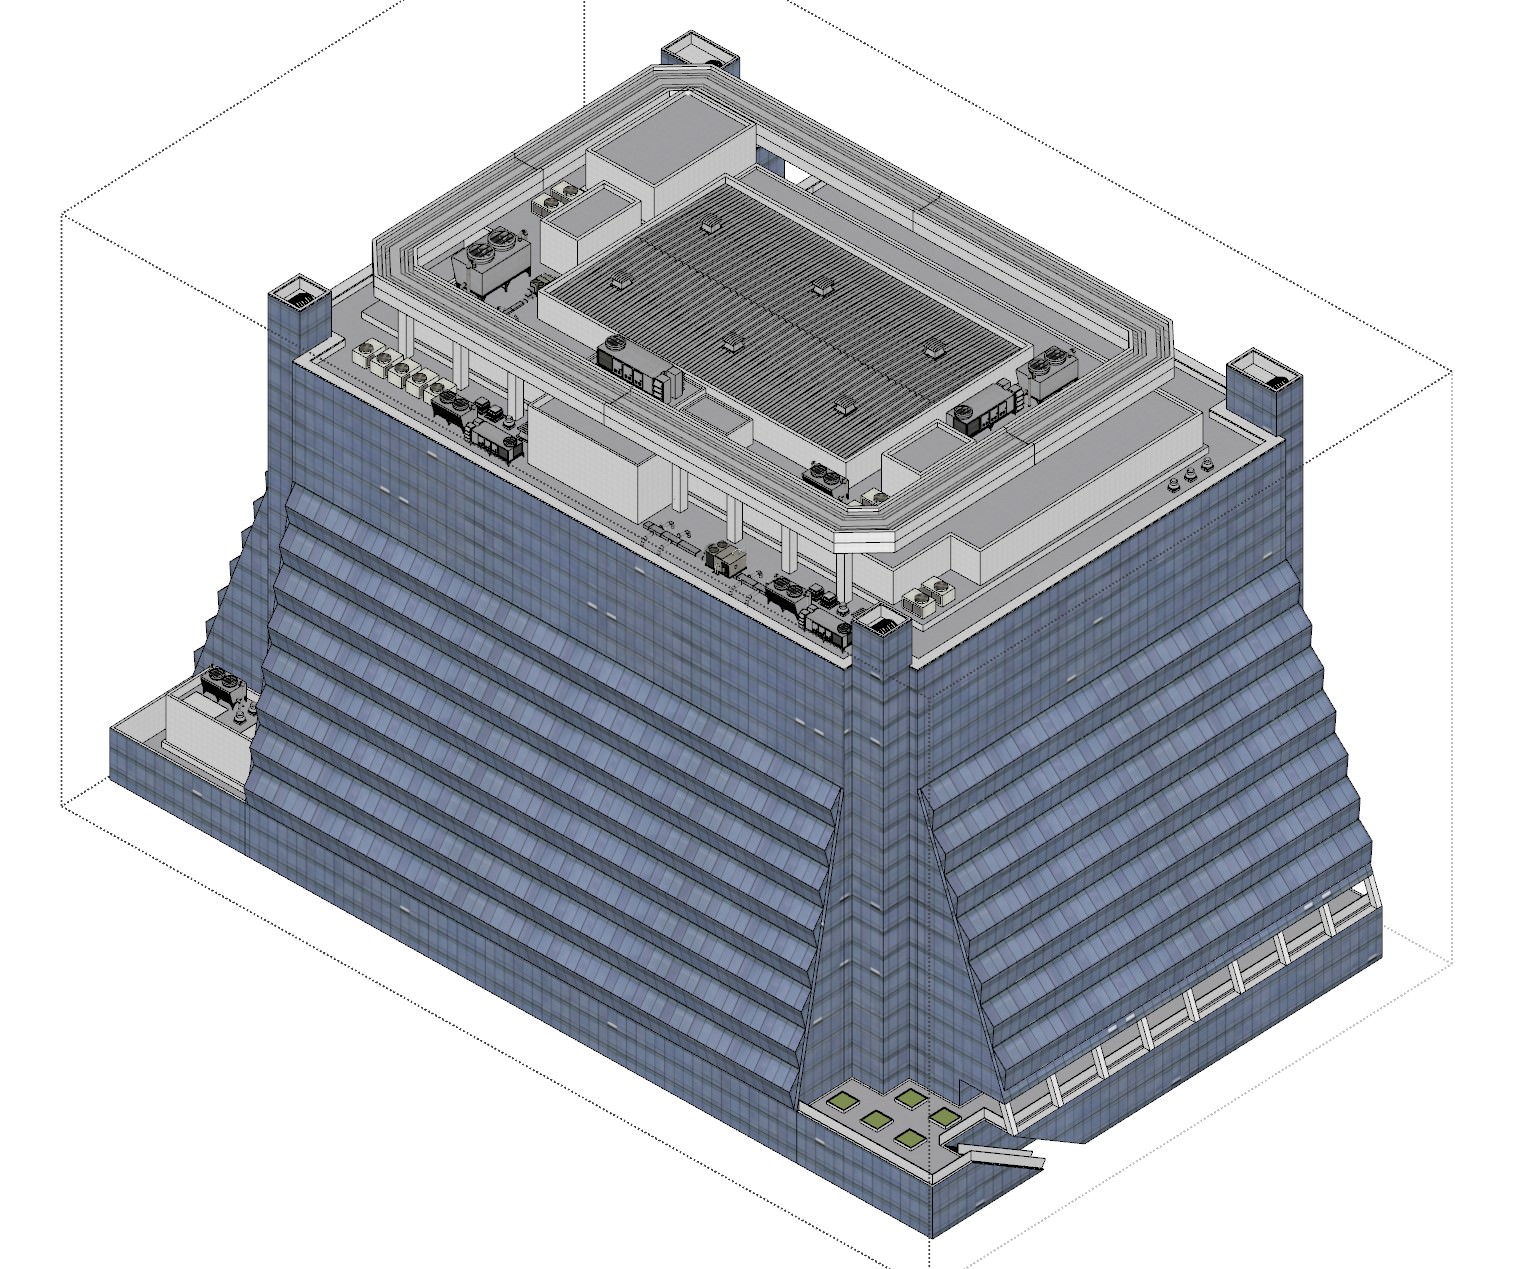
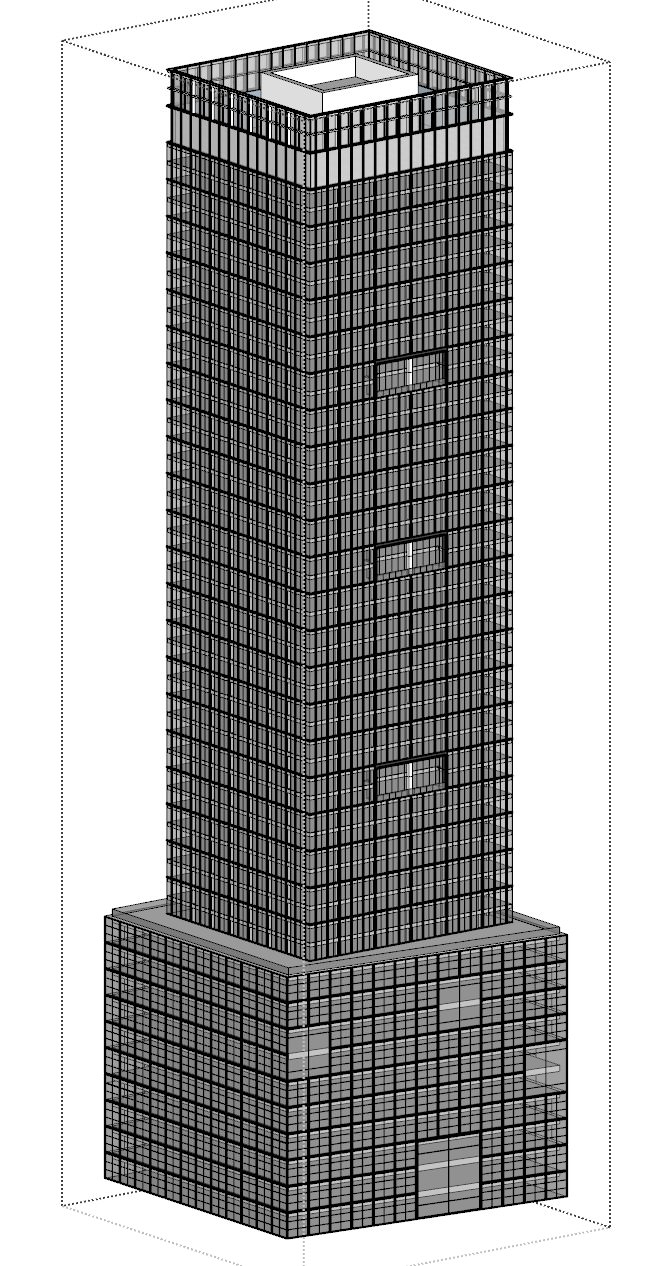
30 Hudson Yards Model.
“You know in advance which side of the building is going to be shown and avoid working on the other sides while keeping the focus on the right side.”
here are some of the building models done for this entry.

Materials
I mostly used default material with a diffuse map applied to it, especially with the surrounding building facade and our skyscrapers’ internal spaces.
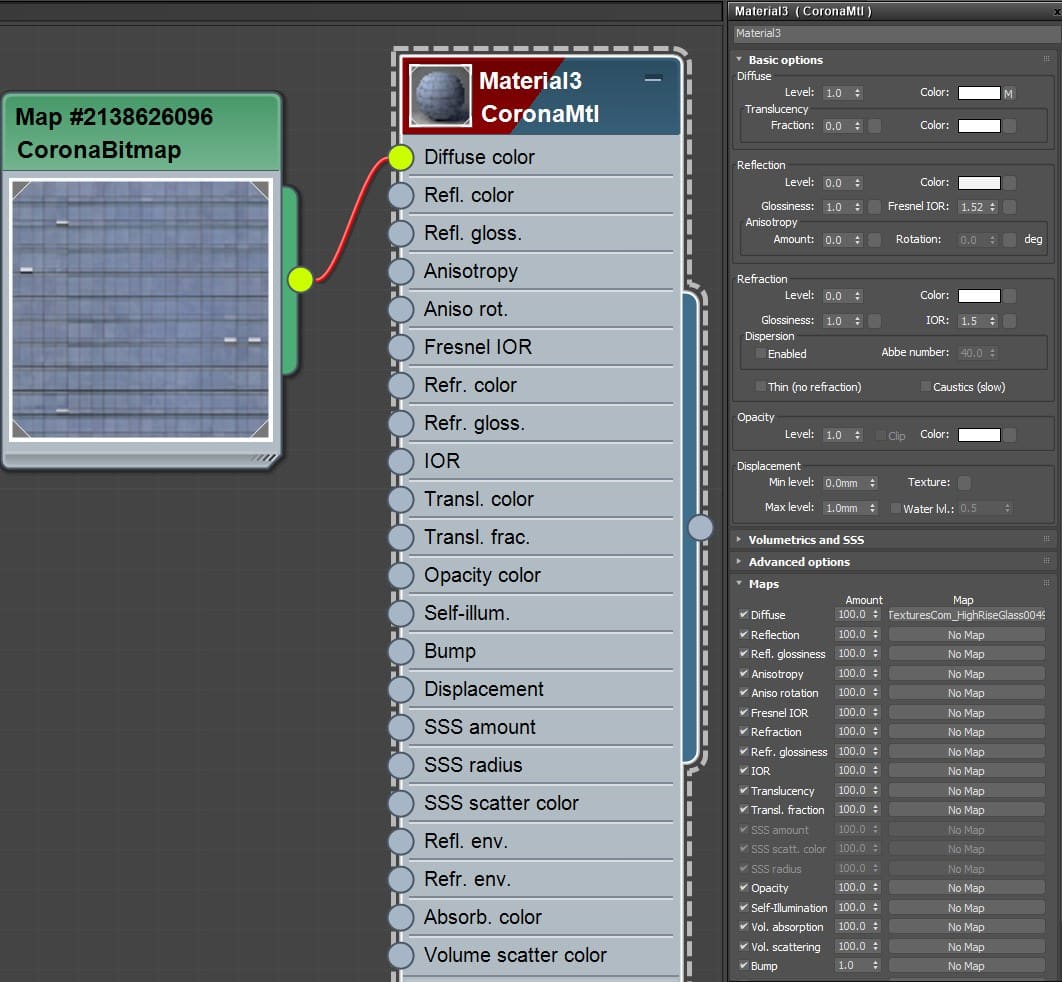
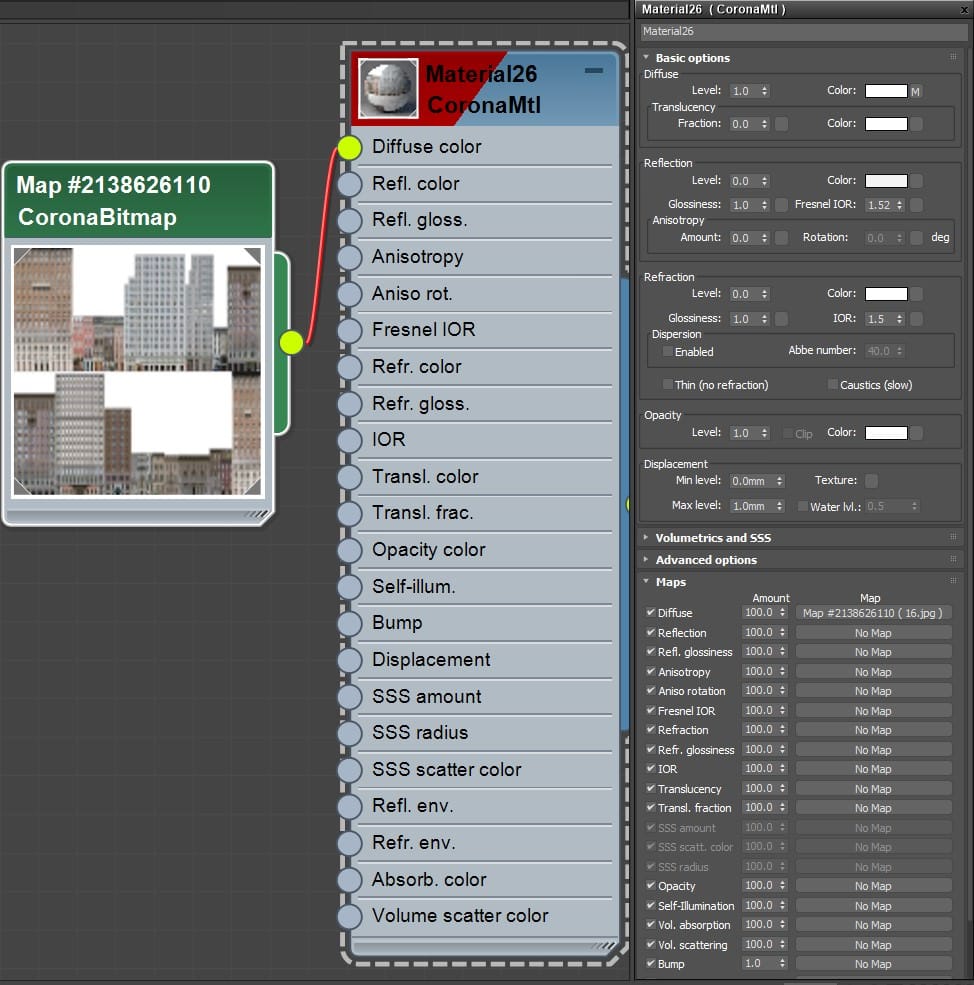
“For the most dominant building in the scene, the 30 Hudson Yards, there are also only two basic materials: glass panels and aluminum frame.”


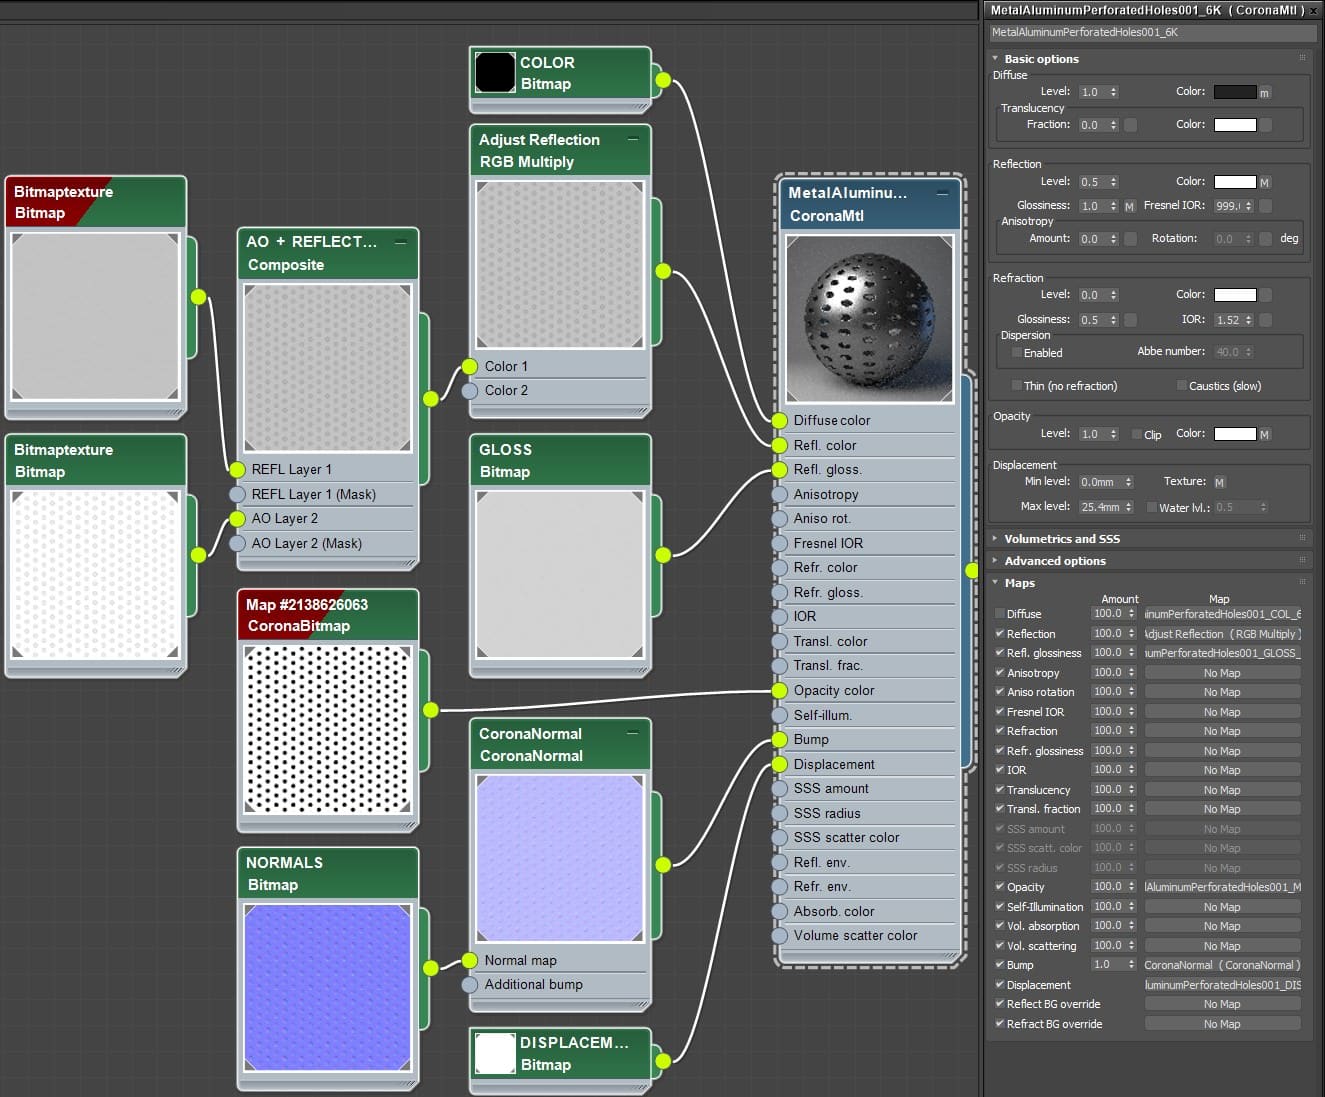

Bridge metal materials set up.


Conclusion
Gathering References

Also, again, it would cost much less time with my weak computer! I skip the Camera, Performance, and System tabs since I kept them as they are from the default settings.
In the Render Elements, I mostly use these passes for my post-production, mainly the ID Mask and Reflection are always useful when I try to improve the image piece by piece.
You can see I have a Lightmix set up here. During the working process, I heavily and continuously rely on Corona Lightmix to experiment with my images to find the most suitable lighting condition. After finding the most satisfying one, I then mimic these light mix settings into real ones like what you saw in the Lighting section.
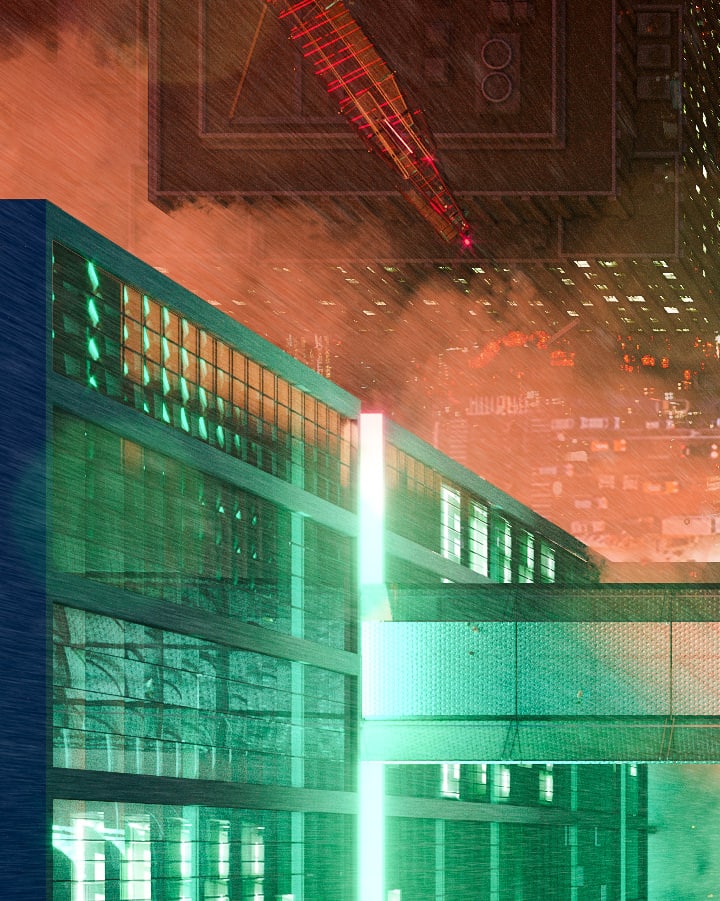
Post Production

The Wired material is set, as seen below.


“Thank you so much for reading this!
I hope you find some exciting and helpful tricks along the way! All the other three ‘MAKING-Of’s’ will follow this one, so it would be much appreciated if you can look at them.
Feel free to drop any questions in the comment section below. I promise I will try to give you the best answer!
Very best wishes,
Duy.”
Big thanks to Duy for covering his winning entry creation process! Stay tuned for more soon.
Thank you very much for publishing the Making-of Ronen, couldn’t be happier to share with everyone a little bit what’s behind the actual seen image! 🙏
Looking forward to the other parts, as I’m sure others do to. Keep up the good work.